Sunday, April 22, 2012

Square Foot Gardening

I have decided to use the Square Foot Gardening techinque for my veggies. I will update the progress.

This weekend we built most of the boxes and got them filled and planted.
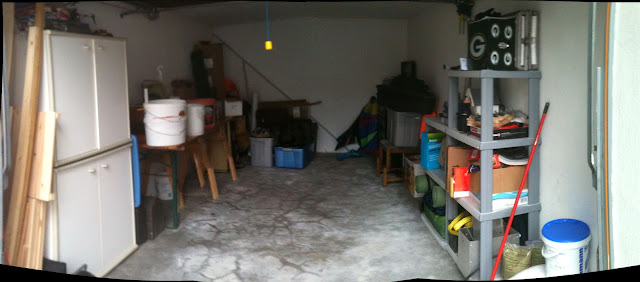
As you can see, Saturday morning my garage looked like a garden center storage unit.
The overall plan. The bottom is oriented north.

One box in place.

Two boxes.


My assistant figuring out a compression clamp.


Day 2: Boxes in place and the new assistant is smoothing the soilless mixture in the first (largest) box. This one held about 10 cu. Ft. of soil with about 2 cu. Ft. of sand as a base.

He's a natural!

Alex wanted to use the water hose. Andy is a great supervisor.

The boys did a great job. There's absolutely no way I could have got so much done without their help!
 Now for the finished product pictures...

Block By Block
Top row: Golden Bantam corn (4), Big Rainbow tomato seedling, head lettuce x2, cherry tomatoes x2
Bottom row: Black Aztec corn (4), head lettuce x3, carrots (16) x2
Corner box: Varied colors banana peppers x4

Panorama View

Front corner
Corner box: San Marzano tomato seedlings x2, yellow flower, bell Pepper
Long box: Beefsteak tomato, Watermelon radish(4), Basil(2) Chinese Red Meat radish(3), Chives(2) Basil(4), purple flower

Aerial view of back corner box.

Left to right: White onions(16), head lettuce, Red onions(16), head lettuce, Vidalia onions(5) white sweet onions(7) yellow sweet onions(4)

Left to right: Beefsteak tomato, Watermelon radish(4), Basil(2) Chinese Red Meat radish(3), Chives(2) Basil(4), purple flower

Friday, April 20, 2012

Random Venting

I came across this looking for a peat moss substitute. http://www.gardenrant.com/my_weblog/2009/04/ken-druse-dishes-the-dirt-about-peat-moss.html

Excerpt:
Just as you point out that, "Some wetlands scientists point out that a managed bog lacks the biodiversity of the original bog", so the forest where the sawdust originally comes from also lacks that "biodiversity" of the original forest. I also wonder about the coconut plantations where coir is harvested from. Are they bio-diverse? Coir comes from fibers found between the husk and the outer shell of a coconut. The coconut plantation certainly displaced the native flora and fauna of the area they are grown in.
Posted by: trey | April 30, 2009 at 07:08 AM

I wonder if this guy realizes that the native flora and fauna were displaced to create his house and yard, not to mention the corporate factories that produced the computer, electricity, and all other aspects of his existance. I get going green, but come on people.... If you're going to criticize one industry for clearing land to do buisness and clearing land to farm, Why the F**K cre you still sitting in your electric heated house, wearing your fleece pajamas, plastic bottomed house shoes, surfing the net on your computer, and driving your car to work?

Can't you move into the woods, build a lean-to, and walk barefoot everywhere? Oh, yeah, the lean-to will displace nature, as do your footsteps. People need to stop being so haughty about things that are wrong while, obviously, not caring about their own impact on nature and their carbon footptint.

Sunday, April 15, 2012

The yard

Figured I'd show just how small my yard is. What you see is what you get. At least I'm not cramped in an apartment with only a balcony. I have to have somewhere to enjoy the outdoors.

Other weekend projects

I even got my garage somewhat straightened up today. With all the planting, potting and construction the past couple weeks I could barely find the floor to walk.

Just thought I'd show the electric hook-up in the greenhouse. Standard outdoor double outlet stuck in the ground through the cardboard floor. I have the connection elevated to reduce risk of water getting in it and shorting out my system.

Earlier pics

I just realized I never uploaded the pics of the ghetto lights I had before I made it to OBI for the new hardware.

Add caption

It was a double floodlight fixture mounted to a 1x10 and wired to an old plug so I could plug it in. I only had one floodlight bulb, so the other socket held a normal 60w bulb.


Looks a little different now.

New Pics after busy weekend re-arranging

This week I completely re-arranged the greenhouse. This lay-out is MUCH mor user-friendly. I also installed the lights. I don't get enough sun on the house, yot, so I have to extend the days.

The lights start with a warm red CFL, then a cool white CFL, then repeat the pattern. I did this so the plants still get the full spectrum of light as they do from the sun. The heater keepis it above 50°F overnight and I turn it up to 65°F for the light hours.

I played with a panorama program to create this pic.

Another panorama creation.

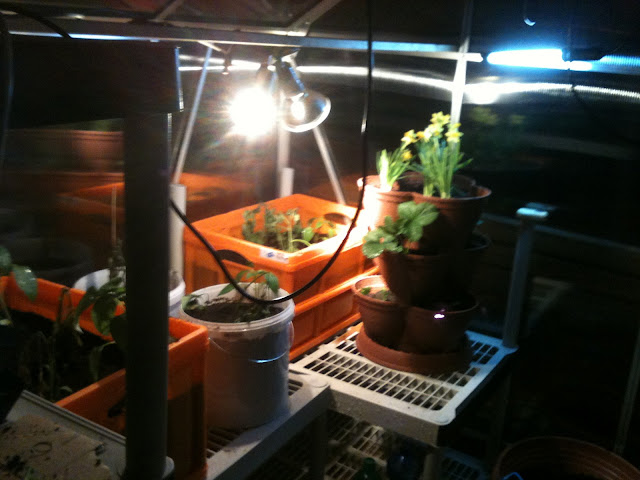
Just after dusk with the lights on.

Sunday, April 8, 2012

New Greenhouse Completed

A week has passed since I last updated. Almost everything I transplanted has wilted, as I had to remove them from the ghetto house on Tuesday night so I could start the new greenhouse. It is complete, finally. After working Tuesday, Wednesday, and Friday night 3 hours each (mostly in the dark), and the majority of Saturday with Angel's help, it is finished.
What I came home to Monday night.

After much frustration this was today (Sunday) around 4 pm. The roof vent-window is installed with a thermal automatic opener, so the plants won't "cook" on the vine while I am at work during the heat of the day.

Since I am living in a rental I could not dig a foundation, So I used concrete pavers and corner "L" beams to level and support the base. I found the pavers and blocks behind my house. They were left over from the drive-way/parking area.

Current interior pic. Cheap re-puropsed Home Depot shelves I have had in my storage building for 3 years. Cardboard floor, as I wasn't going to haul in a truck load of gravel and mulch. The cardboard will stop any earth-borne diseases as well as keep me from having to cut the grass inside the greenhouse. Next step is to buy some patio pavers to lay in for a walk-way.

Nursery bought peppers, tomatoes, may flowers, strawberries, cantaloupe, and cucumber plants. I hope to get them into their permanent containers by next weekend.

I backfilled around my makeshift foundation with a large tub of sandy dirt I found out back. I put about 2 inches of compost substrate on top to hold water and keep it from washing away. I transplanted some patches of moss (I hope it spreads to hold the dirt in place). This is to shed water and keep the inside from becoming a perpetual mosquito puddle when it rains. The poles that flank the greenhouse are for the petter and tomato "Topsy-Turvy" planters.

View from the driveway, of the door and steps. This shows how much I had to backfill as the back left corner is on the ground and the front right corner is about 6.5 inches off the ground.

Sunday, April 1, 2012

Global Bucket 1

Idea from http://www.globalbuckets.org/ for cucumbers.
Green arrow points to fill tube for watering and red arrow points to overflow/air hole.

View from above. Center cylinder is for compacted soil to wick water up from bottom bucket. Small holes are for drainage and areation.


Upper bucket. Blue arrow is capillary action (wicking) chamber. Green arrow shows fill tube. It is notched to avoid clogging and to effectively fill the lower bucket with water. Since "normal" 5 gallon buckets aren't common in Germany I had to modify the desigh to use 18 liter oval buckets. Red arrows point to supports so the weight of the soil doesn't break the bottom and ruin the design.


I mixed the soils above to make my finished potting mix. The yellow bag is a year old, so it is mostly filler. I used 5 scoops of it to 1 scoop of each of the bags above. Mixed it in water to acheive roughly peanut butter consistancy before adding to pots.


This is the starter mix I used to propagate the seeds I started in the house.